
SFM Compile: What It Means, How to Compile a Model, and How to Render Your Film

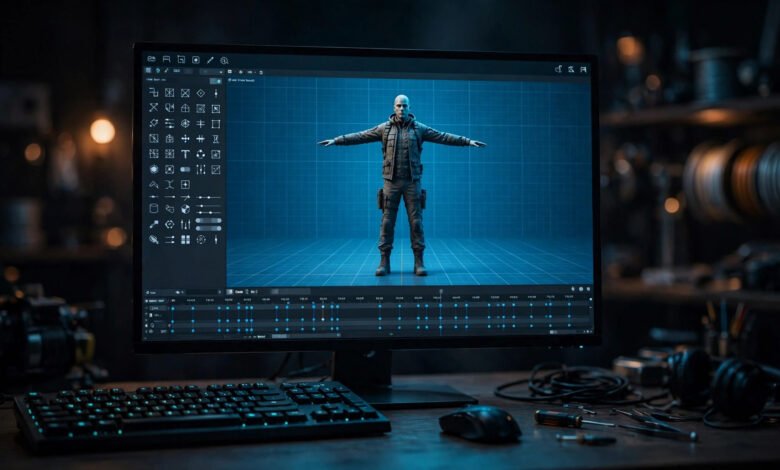
SFM compile means two different things, and mixing them up is the reason most beginners get stuck. In Source Filmmaker, compiling a model means turning a raw 3D file into a format the Source engine can load. Compiling a scene means rendering your finished animation into a video file or an image sequence that you can share. Both jobs use the word compile, both are free, and both follow a clear set of steps once you know which one you are doing.
What Does SFM Compile Mean?
Source Filmmaker, usually called SFM, is a free 3D animation tool made by Valve. It runs on the Source engine, the same engine behind Team Fortress 2, Half-Life 2 and Portal. Valve released it to the public in 2012, and it is free on Steam. You use it to pose characters, light a scene, animate a shot and then turn that shot into a finished film.
The word compile comes from software, where compiling turns raw code into a program that can run. SFM uses the word in a similar way. It turns raw material into something finished and usable. The confusion starts because SFM has two kinds of raw material.
The first kind is a model. A model you build in Blender or Maya is raw material. SFM cannot load it as it is. You have to compile it first, and the result is a model file SFM can open, pose and animate.
The second kind is a finished scene. A scene sitting in the SFM timeline is raw material too. You cannot upload a timeline to YouTube. You have to compile it, which in this case means rendering it, and the result is a video file or a set of still images.
So when someone searches for SFM compile, they usually mean one of these two jobs. This guide covers both, starting with the model job, because that is the one that stops most new creators first.
What Do People Mean by SFM Comp and SFMCompile?
The search terms sfm comp and sfmcompile are shortened and joined up versions of the same phrase. SFM comp is a truncated search, the kind of short query people type when they are in a hurry. SFMCompile, written as one word, is the same phrase with the space removed, and it is also used as a name for guides and websites about the process.
Neither spelling is the name of an official Valve application. SFM compile is mainly a process, not a product you download. The real compiler for models is a Valve tool called studiomdl, and the real way to render a finished scene is the Export Movie command inside SFM itself.
One warning is worth giving early. Some low quality guides tell you to download a file called sfmcompile.exe from a random website. I could not verify that file as an official Valve tool from any Valve or Steam source, so this guide does not treat it as one. Do not download an executable from an unknown site when the verified tools are already free and already inside your SFM install. The safe route is studiomdl for models, Crowbar as a friendly front end for it, and Export Movie for finished scenes.
Why Source Filmmaker Cannot Use a Raw Model
Modern 3D software saves models in general formats such as OBJ or FBX. The Source engine does not read those formats directly. It reads its own formats, and the main one is called MDL. A compiled model is really a small set of files that work together, and SFM needs all of them before the model will load.
The main file is the MDL file. It holds the model name, the shape, the bones and the list of animations. The VVD file holds the vertex data, which is the detail of the shape itself. The VTX file holds optimised mesh data for your graphics card. The PHY file holds the physics data, which tells the engine how the model should collide with other objects. If any of these files are missing or in the wrong folder, the model may fail to load, or it may load with the wrong shape.
That is why compiling exists. It is the translation step between a modern 3D program and an engine built around its own file types. Without it, a custom model made in Blender simply will not show up in SFM.
The Files in a Model Compile
A model compile has inputs and outputs, and it helps to learn the file names before you start.
The inputs are the files you make or export. An SMD file holds the mesh or an animation. A DMX file is Valve’s more flexible format for the same kind of data, and it is often used for animation and facial work. A QC file is a plain text script. It is the recipe for the compile, and it tells the compiler where everything is and how to put it together. A VTF file is a texture in Valve Texture Format, and a VMT file is the small text file that tells the engine how to use that texture.
The outputs are the files the compiler makes: MDL, VVD, VTX and PHY. A successful compile produces all four, and you copy them together into the right folder inside SFM. If you copy only the MDL file and leave the rest behind, the model will not work properly.
Textures cause a large share of failed compiles. SFM needs textures in VTF format, not in the PNG or JPG format you may have used while modelling. You convert them with a free tool called VTFEdit, and you write a VMT file for each texture so the engine knows where to find it. If the texture path in your QC file does not match the folder where the texture actually sits, the model will load with a pink and black checkerboard pattern instead of its proper surface. That pattern is the engine telling you it cannot find the texture.
The Tools You Need
Every core tool in this workflow is free. You need SFM itself, a 3D program, an export add-on, a compiler and a texture tool.
Source Filmmaker is the host program. You install it free through Steam, and it contains the compiler, studiomdl, inside its bin folder. It runs on Windows.
Blender is the most common modelling program in the SFM community. It is free, and the Blender Source Tools add-on adds the export options you need. With that add-on installed, Blender can export a mesh or an animation as an SMD or DMX file. Maya and 3ds Max can also be used, but Blender is the usual starting point because it costs nothing and the add-on is widely used.
Studiomdl, sometimes written as StudioMDL, is Valve’s model compiler. It is a command line tool, which means you run it by typing a command rather than clicking buttons. It reads your QC file and makes the MDL, VVD, VTX and PHY files. It ships with SFM and with the Source SDK, so you do not need to buy or download it separately.
Crowbar is a free community tool that gives studiomdl a graphical interface. It is made by ZeqMacaw and it is available on GitHub. With Crowbar you pick your QC file, choose an output folder and click Compile, and you can read the log while it runs. Crowbar does not replace studiomdl. It runs the same compiler behind the scenes and makes the errors much easier to see. That matters, because studiomdl on its own closes its window as soon as it hits an error, which makes debugging very hard for a beginner. Crowbar also decompiles models, which means it can turn an existing MDL file back into SMD and QC files so you can study how it was built.
VTFEdit is the free tool for turning ordinary images into VTF textures and for writing VMT material files. Notepad++ is a free text editor that many creators use for writing QC files, because it handles plain text cleanly.
How to Write a QC File
The QC file is the most important part of a model compile. It is a plain text file with the extension .qc, and it tells the compiler exactly how to build your model. A short QC file for a simple prop can be only a few lines long.
A basic example looks like this in plain text. Do not copy it without changing the names to match your own files.
$modelname "props/my_prop.mdl"
$body "my_prop" "my_prop_ref.smd"
$cdmaterials "models/my_prop/"
$sequence "idle" "my_prop_idle.smd"
$collisionmodel "my_prop_phys.smd" { $mass 10 }
Each line has a job. The $modelname line sets the name and the folder of the finished MDL file. The $body line links the main mesh, which is the reference SMD file. The $cdmaterials line tells the compiler which folder holds the textures. The $sequence line links an animation, in this case a simple idle animation. The $collisionmodel line links the physics mesh and sets its mass.
Two mistakes cause most QC problems. The first is a wrong path. If the SMD file is not where the QC file says it is, or the texture folder does not match, the compile will fail or the model will load without textures. The second is a missing animation. Source models need at least one animation sequence, even for a prop that never moves, so a simple idle sequence is the usual answer.
Write the QC file in a plain text editor such as Notepad++, save it in the same folder as your SMD files, and check every file name and folder name against the real files on disk before you compile. A single letter wrong in a path is enough to stop the whole job.
How to Compile a Model, Step by Step
First, build or open your model in Blender and make sure it is ready. Check that the shape is complete, the bones are set up if it is a character, and the texture paths are correct. Keep the polygon count reasonable. A very heavy model will be slow in SFM, so a simple prop is the best first test.
Second, install the Blender Source Tools add-on if you have not already done so, and export the model. Export the main mesh as a reference SMD file. If the model has a physics shape, export that as a separate collision SMD file. Export each animation as its own SMD file. If you are working with facial animation, DMX is the more flexible format, but SMD is the usual choice for a first compile.
Third, convert your textures. Open each image in VTFEdit, save it as a VTF file, and write a VMT file that points to it. Put the textures in the folder your QC file names, and double check that the names match exactly.
Fourth, write your QC file as described above, and save it beside your SMD files.
Fifth, compile the model. The beginner friendly way is Crowbar. Open Crowbar, go to the Compile tab, set the game to your SFM usermod folder, browse to your QC file, set the output folder, and click Compile. Read the log as it runs. If it succeeds, you will see the MDL, VVD, VTX and PHY files in the output folder. The direct way is studiomdl from the command line, in the bin folder of your SFM install, with your QC file as the argument. It does the same job, but it gives you less to look at when something goes wrong.
Sixth, copy the four output files into the models folder inside your SFM usermod folder, keeping the folder structure your $modelname line set. Then open SFM, load a scene, and add the model. If it appears with the right shape and textures, the compile worked. If it does not appear, or it appears as an error model, go back to the log. The log will usually name the missing file or the wrong path, and that is the fastest clue you will get.
How to Compile a Scene, Step by Step
Compiling a scene is a different job from compiling a model, and it is much simpler. You are not converting a model. You are rendering your animation into a finished video or image sequence.
First, finish your scene. Save your work before you render, because a long render can crash, and a saved session is the only thing that protects you from losing it. Check the animation, the lighting, the camera and the sound before you export.
Second, open the export menu. Go to File, then Export, then Movie. You can also use the shortcut Ctrl and M. This opens the Movie Export dialogue, where you choose how the finished film will be made.
Third, choose your output type. You have two main choices. An image sequence saves every frame as a separate image, usually in TGA or PNG format. A movie file saves the whole animation as one video file, usually in AVI format. The image sequence is the better choice for a serious project, because each frame is saved on its own. If the render crashes halfway through, you keep the frames it already made. If you render straight to a video file and it crashes, you may lose the whole render. An image sequence also gives you more control in post production, because you can colour grade or edit the frames before you join them into a video.
Fourth, set the resolution and frame rate. Full HD, which is 1920 by 1080, at 30 frames per second is a common starting point. You can also use 24 frames per second for a film look, or 60 frames per second for smoother motion. A higher resolution and a higher frame rate both make the render take longer, so start with a short test render before you commit to a long one.
Fifth, choose an output folder and a file name, and check the render settings for motion blur, depth of field and anti-aliasing. These settings affect how smooth and how cinematic the finished film looks, and they also affect render time.
Sixth, click Export and wait. A short scene can take minutes. A long or complex scene can take hours. Do not close SFM while it is rendering. When it finishes, you will find the video file or the image sequence in the folder you chose. If you exported an image sequence, join the frames into a video with a free editor such as Shotcut or DaVinci Resolve, or with FFmpeg, which is a free command line tool for turning image sequences into MP4 files. SFM itself does not make an MP4 directly in the same simple way, so most creators finish the video in an editor.
Choose an image sequence when quality and safety matter most. It is the choice for a film you care about, a portfolio piece, or any render longer than a few seconds. It takes more disk space, because every frame is a separate file, but it protects you from a crash and it gives you the cleanest material for editing. Choose a direct video file when you want a quick preview. It is faster to set up, it gives you one file you can play straight away, and it is fine for checking how a shot looks before you commit to a full quality render.
Common Errors and How to Fix Them
Most failed compiles come from a small set of causes, and the log usually points at the one that matters.
If your model loads as a pink and black checkerboard, the texture is missing. Check that the VTF and VMT files are in the folder your QC file names, and that the $cdmaterials path matches that folder exactly. Check the spelling of the texture file names too. One wrong letter is enough.
If the model does not appear in SFM at all, check that all four output files are in the right folder, and that the folder matches the $modelname path in your QC file. A model compiled to one folder and copied to another will not be found.
If the compile fails at once and the log names a file, check that the file exists and that the QC file points at it. A missing SMD file, a missing animation file, or a QC file saved in the wrong folder are common causes. Save the QC file beside the SMD files and use the same names in both places.
If studiomdl closes the moment it hits an error and you cannot read what went wrong, use Crowbar instead. It keeps the log on screen, so you can see the exact line that failed.
If a video export fails, try an image sequence instead. A codec problem can stop an AVI export, while a TGA or PNG sequence does not need a video codec at all. Also check that the output folder exists and that you have enough free disk space, because an image sequence for a long scene can take up a large amount of space.
Is SFM Compile Free, and Is It Safe?
Yes, the compile workflow is free. SFM is free on Steam, Blender is free, Blender Source Tools is free, Crowbar is free, VTFEdit is free and Notepad++ is free. There is no paid step in the basic workflow, and you do not need to buy a separate compiler.
It is safe when you get the tools from the right places. Get SFM from Steam. Get Crowbar from its GitHub page or its Steam group page. Get Blender and Blender Source Tools from their official pages. Do not download a tool called sfmcompile.exe, or any other SFM tool, from a random file sharing site, because that is where fake or harmful downloads appear. The verified tools are free, so a site asking you to pay for them, or offering a special download, is a reason to stop and check.
SFM itself is for non commercial use. That is a Valve condition from its public release, so check the current Steam terms before you use a film you made in SFM for a paid job.
Frequently Asked Questions
What is SFM compile in simple words?
SFM compile is the step that turns raw material into a finished, usable file. For a model, it turns SMD or DMX files and a QC script into an MDL model that SFM can load. For a scene, it turns your timeline into a video file or an image sequence you can share.
Is SFM compile a program I download?
No, it is mainly a process, not a single program. The model compiler is Valve’s studiomdl, and Crowbar is a free graphical front end for it. The scene renderer is built into SFM under File, Export, Movie. There is no official Valve application called SFM Compile that you download on its own.
What is sfmcompile, written as one word?
It is the same phrase written without a space, and it is used as a name for guides and websites about the process. Some low quality guides also describe a command line tool called sfmcompile.exe, but I could not verify that file as an official Valve tool from any Valve or Steam source. Use studiomdl for models and Export Movie for scenes instead.
What files do I need to compile a model?
You need a mesh or animation file in SMD or DMX format, a QC script that describes the model, textures in VTF format with VMT material files, and the compiler. A successful compile makes four files: MDL, VVD, VTX and PHY. Keep all four together in the right folder.
Why does my model show as pink and black in SFM?
That pattern means the engine cannot find the texture. Check the $cdmaterials path in your QC file, check that the VTF and VMT files are in that folder, and check the spelling of every file name. It is the most common model compile error, and it is almost always a path problem.
Should I export as an image sequence or a video file?
Export as an image sequence, usually TGA or PNG, for a serious project. It is safer if the render crashes, and it gives you cleaner material for editing. Export as a video file, usually AVI, only for a quick preview. Then join the image sequence into a video with a free editor such as Shotcut or DaVinci Resolve, or with FFmpeg.
Conclusion
SFM compile is not one mysterious tool. It is two clear jobs with the same name. Compiling a model turns a Blender file into an MDL file that the Source engine can load, using a QC script, studiomdl and Crowbar. Compiling a scene turns your timeline into a finished film, using File, Export, Movie, and an image sequence is the safer choice for anything you care about. Learn which job you are doing, keep your file paths exact, read the log when it fails, and the process stops feeling like guesswork. Once the first model loads and the first render finishes, the rest of SFM opens up, because you can finally bring your own models into your own films.